Photostation
A-Frame
construction notes
Instructions for fabricating a Slabsmith photostation A-frame
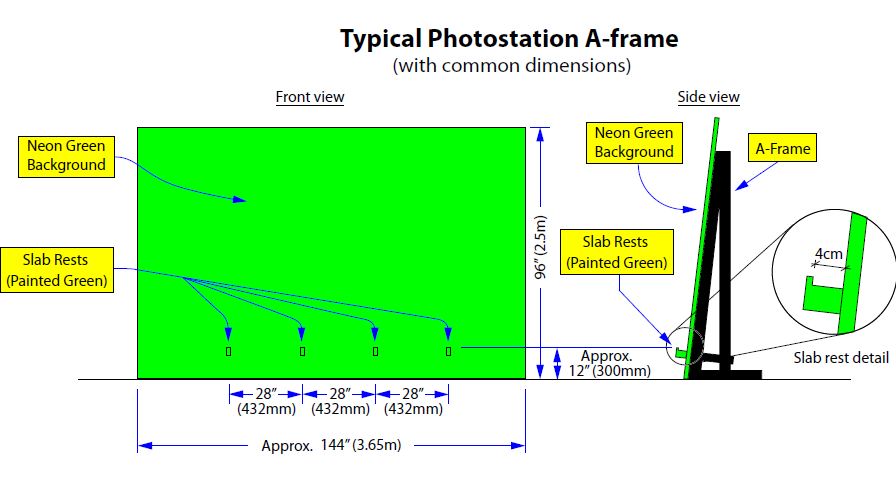
Photostation A-Frame Essentials
The photostation A-frame is usually customized to the specific saw or waterjet system that you are using.
Although this page has the information needed to fabricate an A-frame, It is recommended that you contact us before beginning fabrication of your A-frame to assure the very best results. We will work directly with you to determine the specific features of your A-frame.
IMPORTANT NOTES
To avoid the need to fabricate your A-frame twice, please work with us to be sure you are fabricating an A-frame that will work with your specific Saw and that will satisfy the requirements of Slabsmith.
The A-frame must be fabriacted to be strong enough to not move when a slab is loaded. This means you can not use wood to make the A-frame. It must be steel, with full coverage support behind the green background.
Purposes of the Slabsmith™ photostation A-frame:
- To rigidly support the slab during digital slab creation.
- To provide a green background to aid in separation of the slab from the background.
- To provide points of reference to aid in alignment of the slab on your saw.
- To provide fixed areas on the background outside of the slab area for validation targets.
Important Considerations
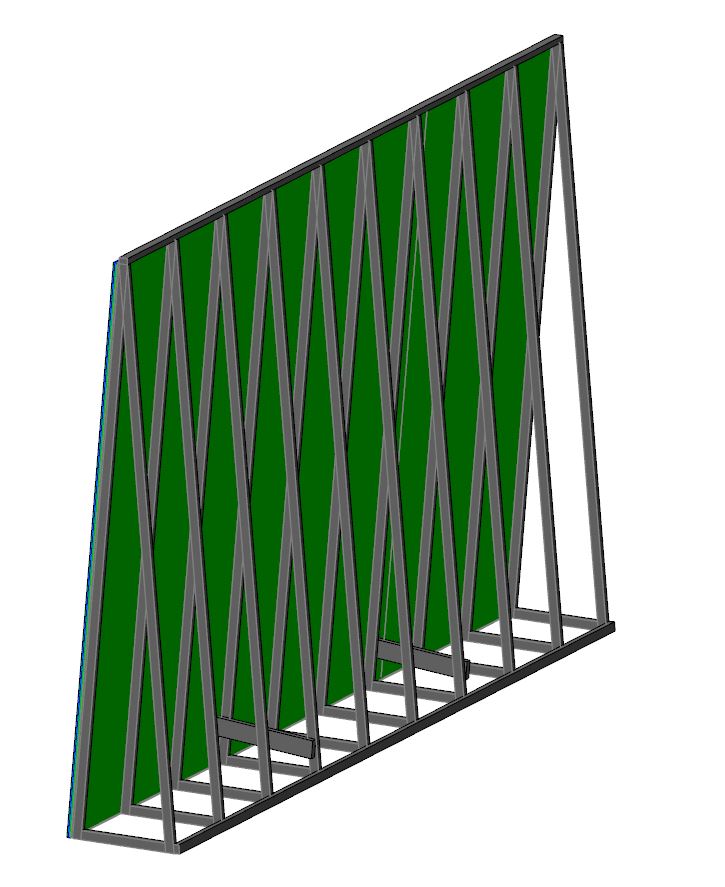
Strength of the A-frame
- The A-frame must be rigid and the background must be flat.
- Wood construction will not work. It’s impossible to make a wood frame that won’t move when a slab is placed on it.
- Steel construction of the frame is required. Build a ‘wall’ of steel, then attach MDO or exterior plywood to the face.
Slab rests
- The “slab rest” is the projection on the front of the A-frame for the slab to rest on.
- 2 rests are recommended, but more than 2 will work.
- If you are using the “fixed point of reference” method to align your slabs on your saw, the rests must exactly match the width and spacing as the rests on your saw table.
- Rest should be approximately 4cm wide to allow for warped 3cm slabs (see slab rest detail above).
- A vertical stop on the rest is recommended to keep the slab from slipping off the front of the rest (see slab rest detail above). This should be high enough to catch the edge of the slab.
- The slab rests should be 8-12″ (200-300mm) above the floor to allow light to reach under the slab.
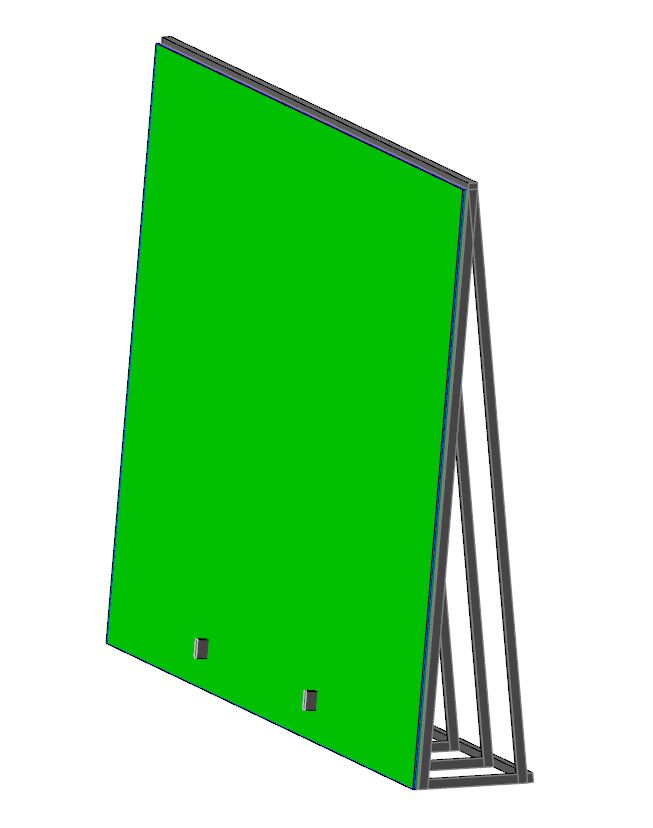
A-frame background
- The background should be securely fastened to the steel frame.
- The background can be MDO or Exterior plywood.
- The background should extend below the slab rests at least 6″(150mm) to allow for validation targets.
- The background should be painted “pure” green. As a reference, see the green in the Slabsmith logo at the top of this page.
Handling the slab on the A-frame
- Vacuum lift – no special instructions
- Lift clamp – If you are using a lift clamp, the background can make it difficult to get the clamp on the slab. One solution is to build a ‘depressed’ area in the top center of the A-frame to allow a clamp to slide behind the slab.If you do leave room in the A-frame for a clamp, you should still give it a green background to aid in digital slab separation.
Additional A-frame pictures
Photostation – Rear view (typical construction)
Photostation – Front view (typical construction)
An actual fabricator’s A-frame, before the background was attached.
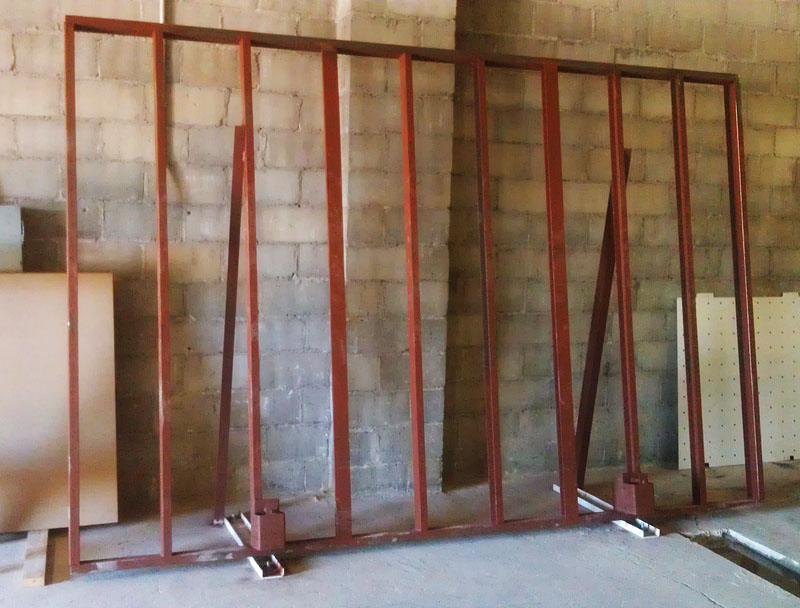
An actual fabricator’s A-frame, after the background was attached, but before the green paint.
